Conductive Sewing Christmas Tree Ornament
Conductive Sewing Christmas Tree Ornament

This project is suitable for anyone who can use needle and thread. Even kids. If you have a different design in mind, go for it! I just picked a tree as I was in a tree kind of mood.
Cost: Low $5-10
Difficulty: Low
Time: 1 Hour Plus
STEP 1: Supplies
If you have sewing supplies then you already have 90% of the gear needed. If not, go to any $1 Store and buy a travel sewing kit or two. That should give you most of the basics and keep the cost down.
The electronics parts can be found several places online. BrownDogGadgets.com, Etsy.com, and Sparkfun.com are places to start.
Brown Dog Gadgets also sells E-Textile Starter Pack and Starter Sewing Supplies.
Electronics:
Conductive Thread
Sewable LEDs: Green, Amber, Red
CR2032 Holder
CR2032 Battery

Sewing Supplies:
Colored Felt
Needles and Thread
Pins
Scissors
Stuffing (If you're making it 3D)
Ribbon or String for hanging


STEP 2: The Pattern
Finding a pattern is insanely easy these days. Figure out what kind of design you want to make, and then head on over to google.com and do an image search for clipart. Yup, clipart.
I did a quick search for "Christmas Tree Clipart" and picked one that I thought looked like it would be easy to cut out. That was it. The same could have gone for "Pumpkin Clipart" or "Shamrock Clipart" for use in other holidays.
For my ornament, I printed it twice. Once at 50% and once at 75%. I like doing any conductive thread project with more than one layer, that way I can hide the thread lines behind the top most layer. I took this same approach when I made the hanging tree version.
Tip: If you've got a weirdly shaped item that you want to use, don't try doing multi sized option I'm doing. Instead sew your shape onto a square or circuit background piece. This will still look really nice and make the entire build a whole heck of a lot easier.

STEP 3: The Circuit
The circuit involved is rather easy. We're just making a very simple Parallel Circuit. Which means we're just making two parallel lines of thread that connect all the Positive points to the battery's positive terminal, and all the Negative points to the battery's Negative terminal.
In the tree ornament I've hooked up 4 amber LEDs this way.
In the large tree hanging art I made two Parallel circuits. One for the left side, and one for the right side. This is why I used two batteries in that version. (The white and blue LEDs use a lot of power and quickly drain the batteries. Thats why I used two batteries.)
STEP 4: Cut Out Your Pattern
Cut out the two paper trees.
Attach them to felt with pins and cut them out.
If you're going to make yours "3D" and full of stuffing, then you'd want two Red felt cut outs and one Green felt cut out.


STEP 5: Sew the Top Two Layers
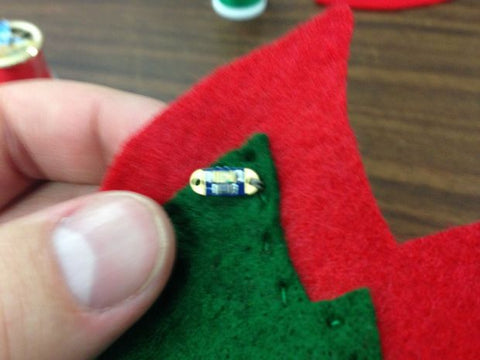
Now sew the smaller Green tree onto one of the large Red trees. Attach them together with pins.
Stitching can take time, and if you've not done it before (or in a while) it can be frustrating. Try and avoid making giant jumps with your thread. Many small stitches is far superior to a few big stitches.


STEP 6: Arrange Your LEDs
Before you start sewing your conductive thread all over the place, decide where you want to put your LEDs.
As we're going to need to do two parallel lines of thread that should never touch, we want to be sure that we're not sewing ourselves into any corners.
In the ornament I'm using 4 LEDs. You could easily use less (just one is fine), or more (if you want), or even multiple colors (now that's fancy). I've spaced all four around the tree in a pleasant configuration.
I've also made a nice mental note as to where I want the battery pack. I've decided to place it on the rear of the ornament, on the second large Red tree. This allows me to easily remove the battery to turn it on and off.

STEP 7: Sew the Positive Line
We're going to use one length of thread to hook up the battery pack's Positive terminal and all the Positive sides of the LEDs.
Thread your needle with conductive thread.
Next, start sewing the left most LED. Make two passes around the Positive hole.
IMPORTANT: Make sure you leave about 6 inches or so of thread at the start of this line. We're going to attach that to the battery pack towards the finish of this project.
You could also start at the top most LED and just leave left over thread as well. I just started from the bottom left most.
Then make your way right, stitching between the two layers of felt. In this way you'll hide the silver thread (or you could work it into your design if you want). It's fine to make large stitches when doing the conductive thread.
Next, connect the right most LED's Positive tab. Then up to the middle, and top.
Tie off the end of the thread and cut any excess off. Stray threads can easily make an electrical "short."


STEP 8: Sew the Negative Line
This will be much more of the same. Again, make sure to leave about six inches or so of thread at the start. (Or if you're starting with the top LEDs, leave extra thread at the end.)
This is where good planning comes into play.
I'm going to start with the RIGHT most LED this time. This is because I planned ahead and made sure all my LEDs were pointing the same direction.
You'll notice that in the third picture I'm "crossing the lines". If you have to do this, make sure your Positive and Negative thread lines are not touching. If you do that you'll make a Short Circuit and your LEDs won't all light up.

STEP 9: Test It Out
Grab your CR2032 Battery and touch those two long strands you left to it.
Your LEDs should all light up. If not, figure out why.
Do you have a Short Circuit?
Do you have a backwards LED?
If something is wrong, now is the time to fix it.

STEP 10: Sew the Battery Pack
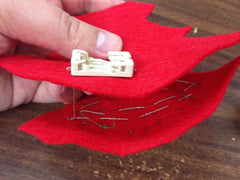
The battery pack is going on the rear of the ornament on the second red piece of felt.
To accomplish this we're going to sew through empty space.
First, look at the battery holder. You'll notice that once side is labeled with a (-) Negative symbol. It's important that you notice that.
Get your needle out and sew the leftover Negative Thread to the Negative terminal on the battery.
Leave plenty of loose thread hanging between the two sides, as we're going to fill this thing up with stuffing.
Lastly, do the same with the leftover Positive thread. Sew that to the Positive terminal on the battery.
Just to play it safe, put a battery in and test it out.
(There are many ways to accomplish what I just did. If you have a better way of doing it, go for it).


STEP 11: Sew the Two Sides Together
Start on the left or right corner and sew the two big Red felt trees together.
Many small stitches will ensure that no stuffing escapes, and that the entire project is held together well.
When you get to the top of the tree you can sew in a ribbon or string. I'm going to hang mine on a real tree, so I put a nice bright green ribbon on mine.
Leave the bottom open so you can apply stuffing.


STEP 12: Add Stuffing and Seal Up
Stuffing is tricky stuff, especially since we've got two threads hanging down the middle.
Start by shoving stuffing up to the top and into all the corners. This tree has many small corners which makes it kind of annoying.
When you get to the bottom area, use the stuffing to make sure that those two threads coming off the battery pack are not touching each other OR making contact with the Positive and Negative lines connecting all the LEDs.
When you've got it all stuffed up, sew the bottom closed.


STEP 13: Big Hanging Tree
I've included a large number of pictures on my big hanging tree demo. The idea is exactly the same, just 2D and without stuffing.
If possible, don't use Blue or White LEDs. They require a higher voltage and burn through batteries faster. In fact the White and Blue LEDs go out on my demo in a few hours, while the Amber (yellow) LEDs will keep going all day.
I also made a nice Laser Cut wooden frame for it, as it was going to be handled by heaps of teachers over several days. This is completely impractical and you could do the exact same thing with cardboard or really thick paper.


STEP 14: You Are Done!
Thats it.
This basic idea can be used for all sorts of fun holiday cheer. Make some fun wearable badges for the kids, or a really awesome light up holiday sweater. How about making some fun wrist bands or adding a cool LED to a backpack? All very possible and easy to do.
I personally love this idea for kids. Anyone in grades five and up can accomplish this. Sewing is a really handy skill to know and most kids are not being taught this. If you're a Boy Scout or Girl Scout you can use this kind of project in a merit badge. (I wish I would have.)
One nice thing is if you find that you really really hate your ornament you can always take the LEDs and battery pack off and use them again.
I hope you enjoyed this project and use it to create something fun of your own!
Here is a PDF with more pictures on how to make this Christmas decoration: LED-Christmas-Tree-Ornament-Using-Conductive-Threa.pdf
